Your phone charger sits loosely in the port. It falls out when you breathe on it. You wiggle it at a specific angle, and a tiny lightning bolt appears—charging has begun. But if you shift the phone by a millimeter, the bolt disappears. You have been living like this for weeks, convincing yourself it is fine. It is not fine. Your USB-C port is not broken. It is not worn out. It is simply clogged with the lint from your own pocket. And the solution you are about to reach for—a metal paperclip—will destroy your phone.
I have seen the aftermath of the paperclip method dozens of times. The bent contact pins. The short-circuited charging IC. The $200 motherboard repair that could have been prevented with a toothpick and three minutes of patience. The USB-C port is a marvel of engineering: 24 tiny pins packed into a space smaller than a pinky fingernail. It is also a lint magnet. This guide will show you exactly how to clean it safely, using tools you already own, and why the internet’s most popular “quick fix” is actually a quiet disaster waiting to happen.
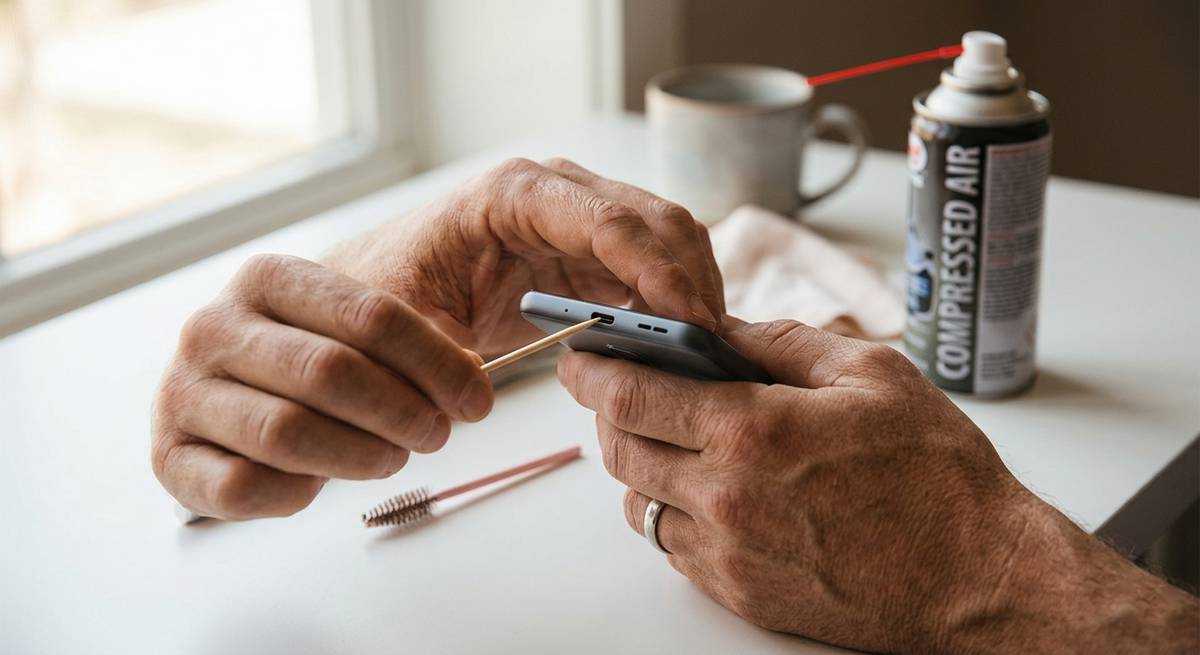
Figure 1: The right tools for a delicate job—a wooden toothpick and a soft brush. No metal anywhere near the port.
📖 Table of Contents
- 1. Why the Paperclip Method Will Destroy Your Phone (The Short Answer)
- 2. The Anatomy of a Clog: How Pocket Lint Steals Your Fast Charging
- 3. The Safe Toolkit: What You Actually Need (And What to Never Use)
- 4. Step-by-Step Tutorial: The Gentle, 5-Minute Clean
- 5. What Not to Do: Compressed Air, WD-40, and Other Myths
- 6. How to Test If You Succeeded (And When to Call a Professional)
- 7. Prevention: Stopping Lint Before It Starts
1. Why the Paperclip Method Will Destroy Your Phone (The Short Answer)
The USB-C port contains 24 exposed electrical pins carrying power and data. When you insert a metal paperclip, you are doing two catastrophic things simultaneously:
First, you are shorting the pins. The paperclip connects multiple pins at once, creating an electrical path that was never designed to exist. This can send voltage to the wrong components. In the best case, your phone instantly shuts down to protect itself. In the worst case, you fry the charging IC—the tiny chip that controls power delivery to your battery. That chip is soldered to the motherboard. Replacing it costs $150 to $300.
Second, you are bending the contact springs. The pins inside a USB-C port are not rigid. They are delicate, spring-loaded arms designed to press gently against the sides of your charger plug. A paperclip is harder than the pins. One aggressive scrape, and you permanently deform those springs. Your charger will never click securely again. The port is now physically broken, not just dirty.
2. The Anatomy of a Clog: How Pocket Lint Steals Your Fast Charging
The USB-C port is a female receptacle. Your charger plug is male. When you push the plug into the port, it needs to travel approximately 6mm (0.24 inches) to make full contact. Pocket lint—those tiny fibers from your jeans, jacket, or backpack—collects at the bottom of the port, millimeter by millimeter. You never notice it happening. Each time you insert your charger, you compress the lint further. Over months, that 6mm depth shrinks to 5mm, then 4mm, then 3mm.
At 4mm of lint, your charger still connects, but loosely. The phone detects the connection but cannot negotiate fast charging. You get “slow charging” warnings. At 3mm, the charger falls out under its own weight. At 2mm, the charger no longer connects at all. Your phone appears dead. You schedule a repair appointment. But the port is not broken. It is just full of your own pocket debris.
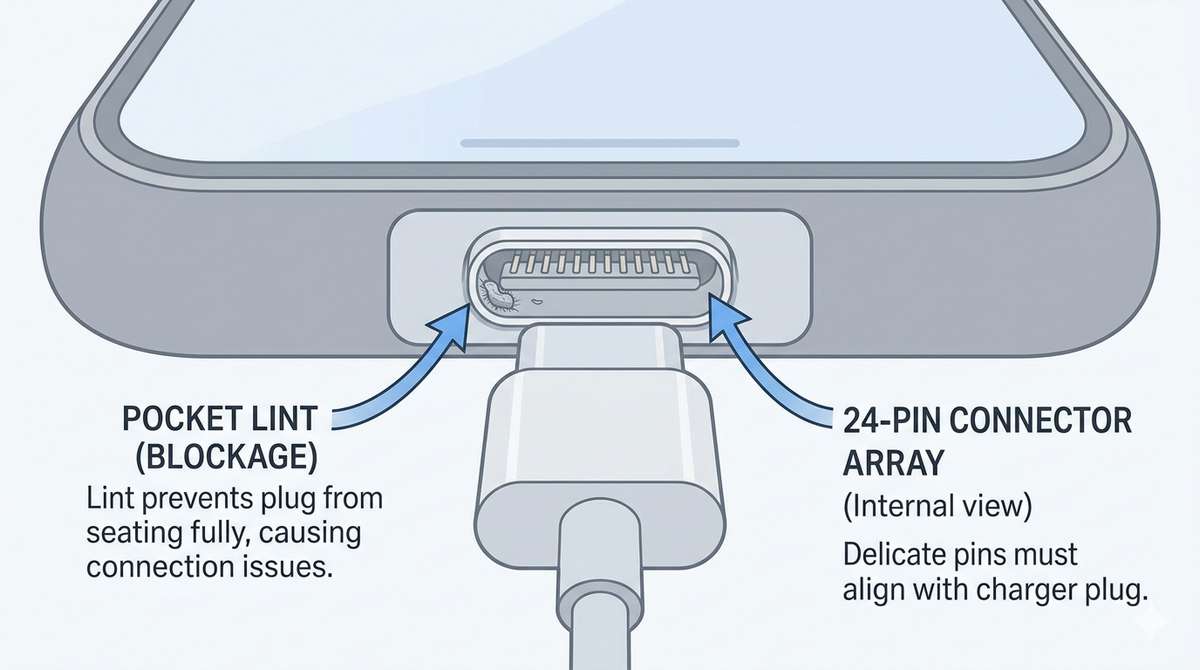
Figure 2: The invisible enemy—compacted pocket lint at the bottom of the port prevents your charger from seating fully.
3. The Safe Toolkit: What You Actually Need (And What to Never Use)
Here is your entire shopping list. Most of these items are already in your home.
The Safe Tools (Use These):
| Tool | Why It Works | Cost |
|---|---|---|
| Wooden or plastic toothpick | Non-conductive, softer than metal, won’t bend pins. The perfect shape for scraping the port floor. | $0.01 |
| Soft-bristled brush | Clean mascara wand (unused), soft toothbrush, or ESD-safe brush. Gentle sweeping action. | $2-$5 |
| Isopropyl alcohol (90% or higher) | Dissolves oils and sticky residue. Evaporates completely, leaving no moisture. Do not use 70% (too much water). | $5 |
| Bright light source | Phone flashlight or desk lamp. You need to see what you are doing. | Free |
The Never-Use List (Dangerous):
- Metal paperclips, needles, pins, or staples: Conductive + hard = short circuits + bent pins.
- Compressed air (canned air): Forces lint deeper into the port. Also, the propellant can leave a residue.
- Vacuum cleaner: Creates static electricity that can fry sensitive components.
- WD-40 or any lubricant: Destroys the plastic housing and attracts more dirt.
- Eraser on a pencil: The metal band holding the eraser will scrape the port walls.
4. Step-by-Step Tutorial: The Gentle, 5-Minute Clean
Work on a well-lit, clean surface. A white paper towel underneath helps you see any debris that falls out. Power off your phone completely before starting.
Step 1: Inspect the Port (The Flashlight Test)
Use your phone’s flashlight (or a separate light) to look inside the USB-C port. You will likely see a dark, compacted mass at the very bottom. That is the lint. If you see green or white corrosion instead, stop—you may have water damage. Skip to the “When to Call a Professional” section below.
Step 2: The Toothpick Method (Primary Cleaning)
Take a wooden toothpick. If the tip is too thick, gently flatten it by pressing it against a hard surface—do not sharpen it to a point. You want a small, flat spatula shape, not a needle.
Insert the toothpick into the port at a slight angle, scraping along the bottom floor of the port. Do not touch the top or side walls—that is where the delicate spring pins live. Pull the toothpick toward you, dragging the lint out. You will see tiny gray fibers emerge. Repeat 5-10 times, brushing the lint off the toothpick onto your paper towel between passes.
Step 3: The Brush Method (Fine Debris)
Take your soft brush (clean mascara wand works beautifully). Gently insert it into the port and make small circular motions. The brush bristles will capture fine dust that the toothpick missed. Tap the brush against your paper towel to see what came out.
Step 4: Alcohol Cleaning (For Sticky Residue)
If your phone has been exposed to sweat, humidity, or sticky liquids, dip the very tip of your toothpick into 90%+ isopropyl alcohol. Do not drip alcohol into the port. You want the toothpick damp, not wet. Gently scrape the port floor again. The alcohol will dissolve sticky residue without damaging electronics. Wait 60 seconds for the alcohol to evaporate completely before proceeding.
Step 5: The Final Blow (Air, But Gentle)
Do not use compressed air. Instead, use your mouth. Give the port one short, gentle puff of air from about 6 inches away. This is enough to dislodge any loosened debris without forcing lint deeper. Tilt the phone port-side down so gravity helps debris fall out.
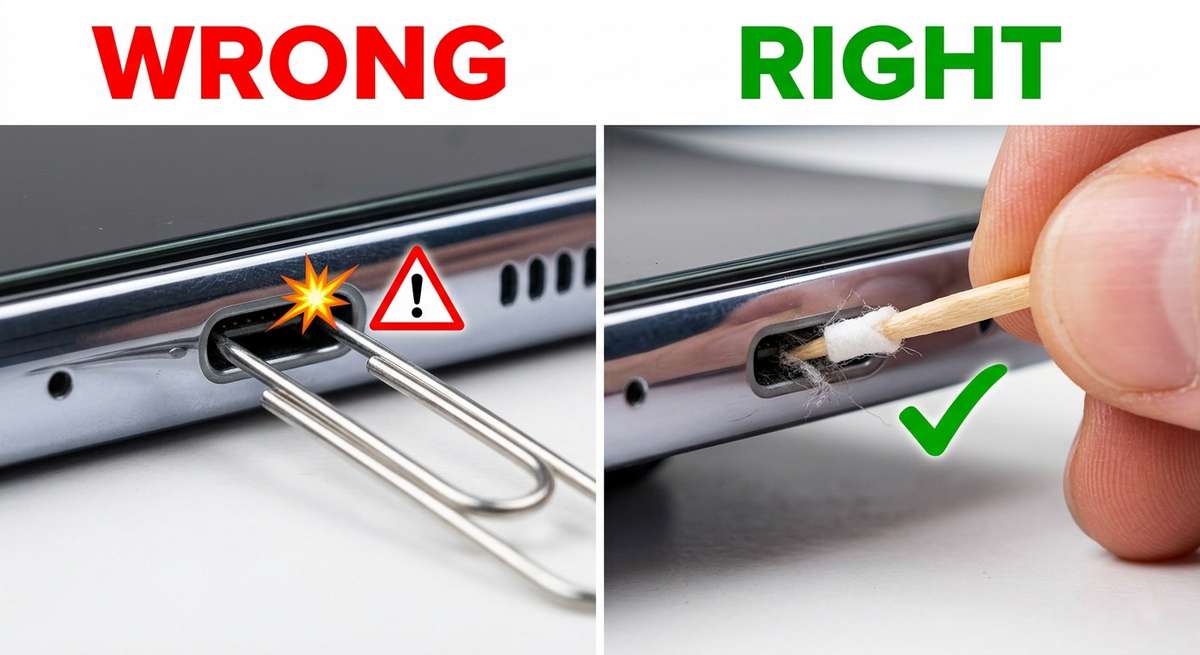
Figure 3: The wrong way (left) vs. the right way (right). Metal destroys. Wood preserves.
5. What Not to Do: Compressed Air, WD-40, and Other Myths
The internet is full of bad advice. Let me debunk the most dangerous myths directly.
- “Just blow it out with compressed air.” Canned air comes out at high pressure—often exceeding 30 PSI. That pressure will compact lint tighter against the back of the port. I have seen ports that required professional disassembly to remove lint that was compressed into a rock-hard pellet by canned air. Additionally, the bitterant additive in canned air (added to prevent huffing) leaves a conductive residue.
- “A vacuum cleaner with a small nozzle works.” Vacuums generate massive static electricity. A single static discharge can be thousands of volts. Your phone’s charging IC is sensitive to voltages above 5V. A vacuum can kill it instantly.
- “Use a sewing needle wrapped in tape.” The tape does not make the needle safe. The needle is still metal. One slip, and the needle touches the side pins. You have created a short circuit with extra steps.
- “WD-40 fixes stuck connectors.” WD-40 is a degreaser and water displacer. It is also an insulator. Spray it in your USB-C port, and your phone will stop charging completely until you professionally clean every trace of it out. The plastic housing may also soften and warp.
6. How to Test If You Succeeded (And When to Call a Professional)
The Click Test
Insert your USB-C charger. You should feel a distinct, satisfying click as the plug seats fully. The charger should not wiggle. If you hold the phone upside down, the charger should stay in place on its own.
The Charging Test
Plug your phone into a known-good charger. Within 30 seconds, it should indicate “Fast Charging” (or the equivalent for your brand). If it only says “Charging” without the fast charging label, you may still have minor debris. Repeat the cleaning process once more.
When to Call a Professional
If you have cleaned the port twice and your charger still falls out, the port may be physically damaged. Stop cleaning. You are now scraping against metal, not lint. Take your phone to a reputable repair shop. A USB-C port replacement typically costs $50-$100 depending on your device. This is cheaper than destroying the motherboard with continued aggressive cleaning.
7. Prevention: Stopping Lint Before It Starts
Once your port is clean, keep it that way. These three habits will extend your port’s life indefinitely.
- Use a dust plug: Silicone USB-C dust plugs cost $5 for a 10-pack on Amazon. Insert one when you are not charging. It takes one second. It blocks 99% of lint. This is the single most effective prevention method.
- Store your phone upside down in your pocket: Put your phone in your pocket with the charging port facing up toward the opening of the pocket. Gravity and pocket lint both travel downward. Facing the port up means lint falls away from the port, not into it.
- Clean your pockets: Run a lint roller inside your jeans pockets once a month. You will be horrified by what comes out. Less lint in your pocket means less lint in your phone.
The USB-C port is a quiet soldier. It asks for nothing, works every time, and never complains. Until it cannot. And then the whispers begin: “Just use a paperclip.” Do not listen. Reach for a toothpick instead. Your phone—and your wallet—will thank you.
🔧 More DIY phone maintenance guides you can trust
Keep your phone healthy: Reviving Dead Earbuds: A Soldering-Free Guide to Replacing Lithium Batteries in Wireless Earbuds | How to Unlock Android’s Hidden “RAM Plus” Feature | How to Enable Android’s Hidden “Suspended Window” Mode: Run Any App in a Floating, Resizable Bubble